 Inside the Asset
Jason Acerbi has used videoscopes from the 1990s through 2026, including about 15 years of weld inspection. In this conversation, he explains how he plans access, obtains useful views, documents findings, and protects the equipment that makes remote visual inspection possible.
This interview has been edited and condensed from Jason’s responses for clarity and approved by him for publication. Answers describe his experience; editorial notes are separate. Jason is Chief Technology Officer and Vice President, United States, at MFE Inspection Solutions. His equipment and supplier relationship is disclosed for readers’ context.
Experience and preparation
What equipment have you used and what have you inspected?
Jason: I’ve used Olympus, GE, Everest, Welch Allyn, Evident, and Waygate equipment across several generations of videoscopes, from the 1990s through 2026.
I’ve inspected tubing and pipe in many diameters and done about 15 years of weld inspection—manual, automatic, and orbital welds, from hygienic welding to utilities. I’ve also inspected heat exchangers on both the shell side and tube side, boilers, reactors, tanks, pressure vessels, and filters. I’ve used remote visual inspection on a wide variety of assets.
Before a weld inspection what do you need to know?
Jason: I need to understand the pipe diameter, its configuration, the access points, the line’s service, and how many welds I’m inspecting. Are they circumferential butt welds or seam welds?
That helps me decide whether I need a 90-degree viewing tip, a centering device, articulation, or a combination. Reviewing the drawings is a critical part of deciding how I’m going to get to the welds and what I can realistically inspect.
Positioning the scope at the weld
How would you approach a weld in two inch stainless steel tubing?
Jason: I want a centering device to lift the scope off the bottom of the tube. I’ve used everything from purge caps and bottle caps to ping-pong balls with holes drilled in them, as well as custom-made centering devices.
I would use a 90-degree tip to get the camera and lighting onto the weld. I want to see the weld bead and the heat-affected zone on each side. Moving the light changes the shadows and helps me get a sense of the surface shape.
Editor’s note: These centering examples describe Jason’s past experience, not approved accessory designs. Any centering device needs to meet the job’s cleanliness, compatibility, retention, and retrieval requirements.
What helps you maneuver around the full circumference?
Jason: Centering matters, and so does technique. I see people struggle because they don’t know how to maneuver the insertion tube once it’s inside. I use a loop in the insertion tube to help rotate the tip around the inside of the pipe. It’s much easier to show than to explain in words.
A demonstration of Jason’s insertion-tube loop technique will be added here. The maneuver is easier to understand visually; it is not presented as a written handling procedure.
What is the weld tail and why do you use it as a reference?
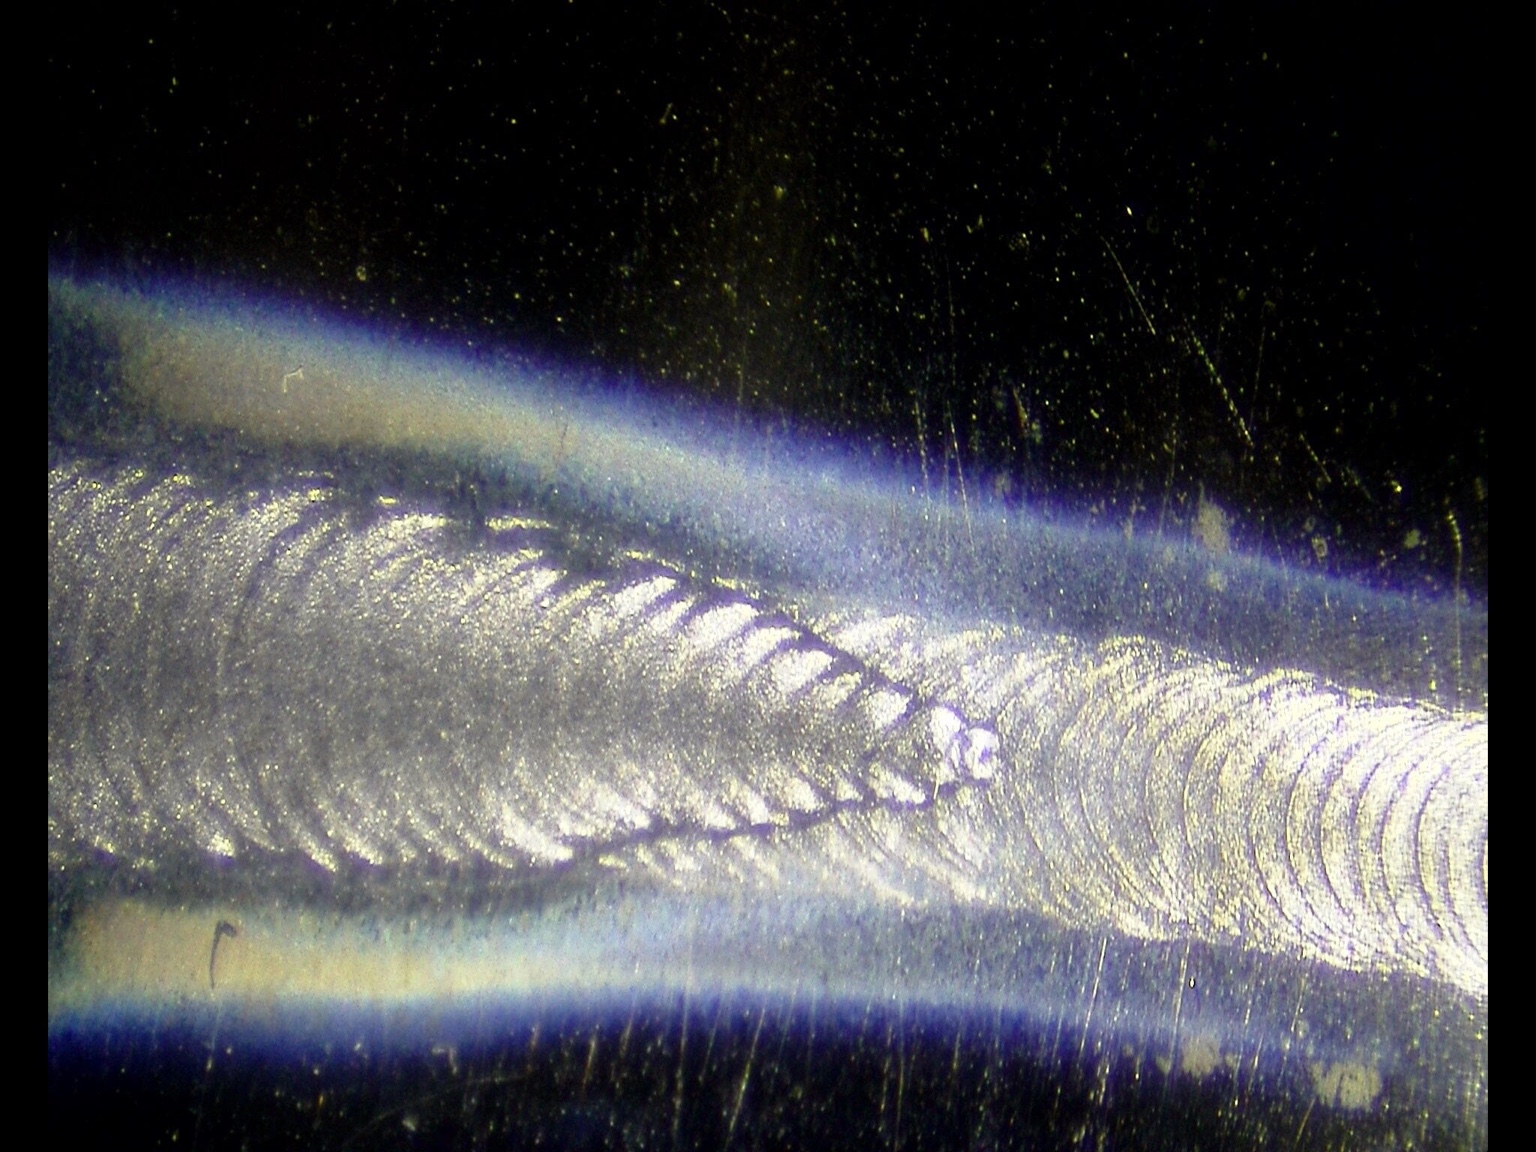
Jason: The weld goes around the pipe, overlaps and consumes its starting point, then tails off. The finish can look like a pencil tip in the bead. I use that tail as a reference so I know when I’ve made a complete pass around the weld.
Interpreting and recording the weld
How do you investigate a questionable indication?
Jason: I change the light position and viewing angle. I move from one heat-affected zone across the weld to the other, watching how the shadows change. I put the light onto the indication and look at whether its appearance changes—whether it looks dark, reflective, raised, or recessed. It’s about maneuvering the camera and light to understand what I’m seeing.
Editor’s note: Shadows and reflectivity are visual clues, not proof of a defect type or a depth measurement. A videoscope view alone does not establish subsurface condition.
What are you looking at in hygienic tubing compared with heavier wall pipe?
Jason: In the thin-wall hygienic tubing I’ve worked on, including 0.065-inch wall tubing, I’m looking at the internal weld profile and visible signs of incomplete penetration, convexity, or concavity. The internal profile matters in a hygienic line, including how the line drains.
On heavier-wall work, a questionable finding may lead to another examination method, such as ultrasonics, phased array, or radiography. The application makes a difference.
Editor’s note: The follow-up technique and its ability to evaluate a finding must be established for the material, thickness, geometry, suspected damage, and applicable procedure. This interview supplies no acceptance limits.
How do you record a weld so another inspector can review it?
Jason: I want the correct tip, sufficient lighting, and a centering device. I go beyond the weld and start on the far-side heat-affected zone, using a recognizable position such as the weld tail.
First, I record the far-side heat-affected zone and weld edge all the way around. When I return to the tail, I pull back slightly and record the center of the weld around the full circumference. Then I pull back again and record the near-side weld edge and heat-affected zone.
Those three passes give the reviewer a comprehensive view of the areas I’m examining, instead of just a quick look at one part of the weld.
Who decides whether a weld is acceptable?
Jason: On pharmaceutical and biopharmaceutical jobs, I work from the customer’s site specifications and the standards they call out, such as ASME BPE. On utility and other piping jobs, B31.1 or B31.3 may be involved, depending on the job.
In the roles I’ve described, the inspector or contractor’s QC inspector records the accept-or-reject decision. The client’s representative may then review a percentage of the welds or all of them, depending on the project requirements.
Editor’s note: Use the governing project documents and applicable code edition to establish criteria and authority. Site specifications do not waive mandatory requirements, and certification alone does not establish every approval role. B31.1 addresses power piping; B31.3 addresses process piping. See the editorial references at the end.
Image quality and traceable records
What is your approach to cleaning and checking the image?
Jason: My routine has included removing the tip, cleaning its threads and optical surfaces with isopropyl alcohol and cotton swabs, and changing the swabs as they become dirty. Where there is a removable gasket, I inspect its condition and clean its seating area. I clean the inside of the adapter as well as the outside viewing surface, then reassemble it.
I like isopropyl because it dries quickly and generally doesn’t leave smudges in my experience. After cleaning, I look at something with different colors and check that I have a clear image, good color, and plenty of light.
Editor’s note: This describes Jason’s routine on equipment he has used. Follow the specific manufacturer’s instructions for solvent, swab type, optical cleaning, seals, and adapter installation. The visual color check described here is not a calibrated color or measurement verification.
When do you withdraw the scope and address conditions inside the asset?
Jason: After tube bundles have been cleaned, there can still be water or debris inside. If the light output or image deteriorates, or I get debris on the lens, I want to take the scope out and clean it. I also pay attention to water getting under the tip.
Sometimes the line itself needs further cleaning or drying. Otherwise I’m going back in and repeatedly encountering the same contamination, which affects the inspection.
Editor’s note: Suspected water ingress or seal failure needs assessment under the manufacturer’s instructions before reuse. Cleaning the visible lens alone does not resolve a possible sealing problem.
How do you tie findings to the correct weld or tube?
Jason: For welds, some jobs use an isometric drawing with weld numbers, welder documentation, and material heat numbers. The welder documents who made the weld, and the inspector signs off the inspection result. Other jobs also require a complete video record of each weld. That documentation is critical to signing off the completed line.
On a heat exchanger, I work from the numbered tubes on the tube-sheet drawing. I identify which tubes I’ve inspected and which have issues. If I find something inside a tube, I can mark the position on the insertion tube, withdraw it, and measure how far in I was, then record that location on the drawing.
How do you report incomplete coverage?
Jason: I take plenty of pictures and videos and work from a plan based on what needs to be examined. I mark the areas I could see and the areas I couldn’t see on a drawing. If I don’t have a drawing, I make a sketch. That becomes part of the report and the deliverable to the client.
Editor’s note: The insertion-length method gives a location reference; routing and slack can affect it. State the entry point, measurement basis, and any uncertainty needed for someone to relocate the finding.
Access limits and measurement
Where do videoscopes run into their biggest limitations?
Jason: The biggest problems I encounter are diameter, length, and configuration. Larger pipe or vessels can be difficult, and so can very small tubing with tight bends. Going horizontally and then down works differently from trying to go up against gravity.
In small tubing, the distal end can get jammed in a 90-degree bend. A smaller-diameter scope may help with access, but the available length may then limit you. That is why I review drawings and communicate whether I can reach a weld or whether additional access will be needed.
Editor’s note: Probe diameter alone does not establish whether a bend is passable. Distal-end dimensions, bend geometry, manufacturer limits, and retrieval must also be considered. Exact probe lengths and tip configurations vary by model; the interview is not a product specification table.
When would you select a different camera system?
Jason: Think about 24-inch pipe or a 36-inch vessel with only a half-inch or one-inch access opening. You can get a small scope through the opening, but you’re trying to inspect a much larger space. You may not have the lighting or ability to direct the scope where you want it.
If there is a larger access opening, I may be able to use a push camera with a pan-and-tilt head, and zoom where available. A larger camera can give me more lighting and viewing control, while a more rigid push rod can help me advance through larger pipe. The access opening determines what system I can consider.
What experience do you have with videoscope measurement?
Jason: I’ve used measurement a few times, so it’s not the area where I have the most experience. I used GE and Olympus equipment before the newer branding discussed in this interview.
The measurement I’m familiar with is stereo measurement, using a special tip and a reference block to check the measurements. You capture the feature and use the system to measure it. The applications I’m most familiar with hearing about are turbine blades in aircraft engines and power generation—measuring visible cracks or other indications. I don’t have extensive hands-on experience with those aerospace inspections.
Editor’s note: Stereo is one measurement approach, not a description of every current system. A reference-block check is not automatically a calibration. Tip compatibility, verification, image acquisition, and measurement confidence require model-specific instructions. No general measurement accuracy or application ranking is claimed here.
Across these examples, Jason’s planning question is practical: can the selected instrument reach the area, produce a useful view, and be retrieved? His reporting approach then records the coverage actually achieved.
Taking care of the instrument
What would you teach a new inspector before a job?
Jason: Take care of the equipment and inspect it before you use it. Check the batteries, charger, and power supply. Make sure you have the correct storage device and that the scope actually records video and takes pictures.
Look closely at the insertion tube, distal end, and bending section. Check for fraying or crushed areas. Check the tip adapter and make sure it’s clean. Turn the instrument on and check the lighting and articulation. Understand the job you’re trying to do and plan the approach.
I’ve encountered situations where damage or reduced articulation affected what the scope could do. Those problems need repair, and they matter to the job. Equipment condition is something you need to pay attention to every time.
Editor’s note: The original discussion included examples of completing limited work with reduced articulation or a damaged insertion tube. They are not presented here as authorization to use damaged equipment. Fraying, crushing, abnormal articulation, or suspected ingress should be assessed under the manufacturer’s service instructions before continued use. Articulation checks must match the model’s design.
What should happen before the scope goes back in its case?
Jason: Don’t rush. First, double-check that the videos and pictures are on the storage device. Then take your time putting everything back where it belongs so it can be found again.
Wrap and stow the interconnect and charging cables correctly. Coil and stow the insertion tube correctly. Packing it away carefully is just as important as handling it properly during the inspection.
What is the most important lesson you want the next inspector to remember?
Jason: Your equipment is the tool that lets you do your job. Pay attention to where you put it, how you use it, and how you put it away. Take your time during the inspection to avoid damaging it.
Without that piece of equipment, you can’t do the job. Not taking care of it is setting yourself up for failure.
Editorial references
ASME’s scope descriptions identify B31.1 as Power Piping and B31.3 as Process Piping. These references establish scope only; the interview does not supply project-specific acceptance criteria.